Enable customers to connect a Go1 account to your platform using the OAuth Connect flow.
Overview
This guide walks through the process of establishing the Go1 OAuth Connect flow within your platform – as a means to allow your customers to connect the ‘Go1 integration’ you’ve built (or will build) to your platform.
The OAuth Connect flow enables your customers to self-connect their Go1 account, also known as a portal, to your platform by simply using Go1’s login and authorization form (we’ll explore this further below).
Each customer who successfully connects via this flow will provide your application with a unique access_token which you will need for future interactions when calling the API on the customer's behalf.
Go1 utilizing the OAuth 2.0 framework to enable the OAuth Connect Flow. The endpoints utilized in this article are the Authorize and Token endpoints - we’ll walk through these in greater detail below.
Why use the OAuth Connect flow?
The OAuth Connect flow provides a fast and easy way for customers to self-connect Go1 to your application without manual intervention from the partner every time a customer requires setup. The OAuth Connect flow provides an out of the box connection form that can be used without leaving your platform.
Note. Using this method to connect customers means that their Go1 Account is visible to them - ie. this flow is not recommended if you are looking to create an invisible/customizable integration experience (eg. white labelling of Go1 content). See Connect customer via the onboard API as an alternative method to connect your customers to Go1.
How it works (example flow)
In practice, the OAuth Connect flow works as follows:
1. The user initiates the connection within your application
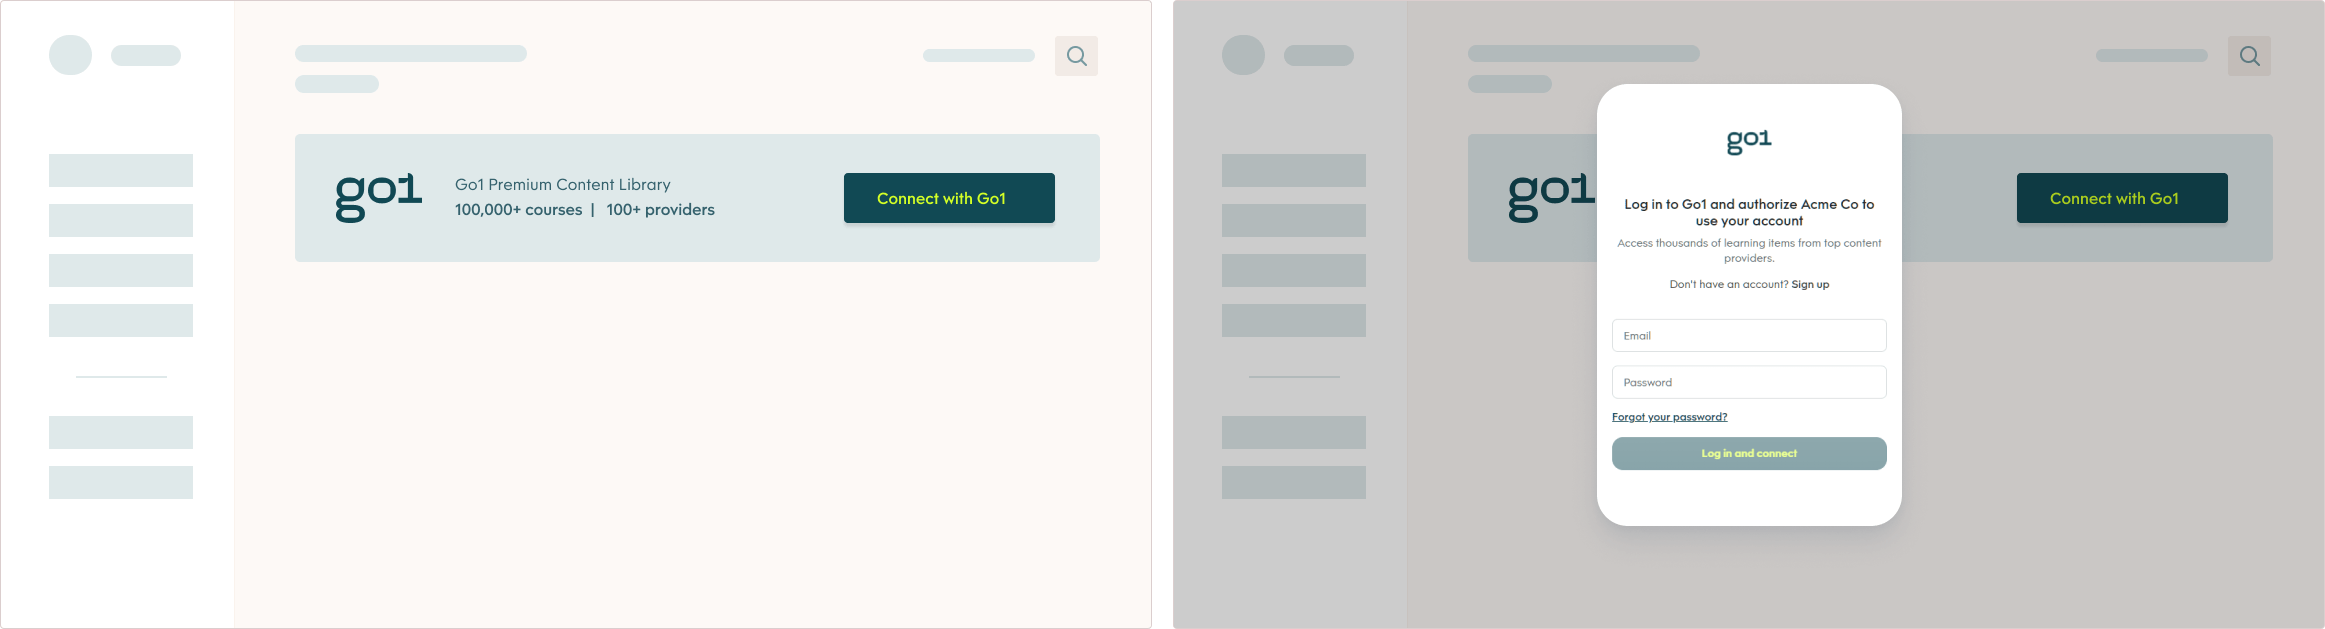
To begin the flow, the connecting customer will click a link or button (eg. Install Go1 or Connect with Go1) within your site. This link will redirect the user to the Go1 login and authorization page.
2. Your application presents the Go1 login & authorization page
The Go1 login page is presented to the user (typically in a pop-out window) asking the user to login with Go1 and authorise access to their Go1 account. The link to this page is constructed using your Partner API Credentials - we’ll walk through how this works in detail below.
3. The user logs in & authorizes access to their Go1 account
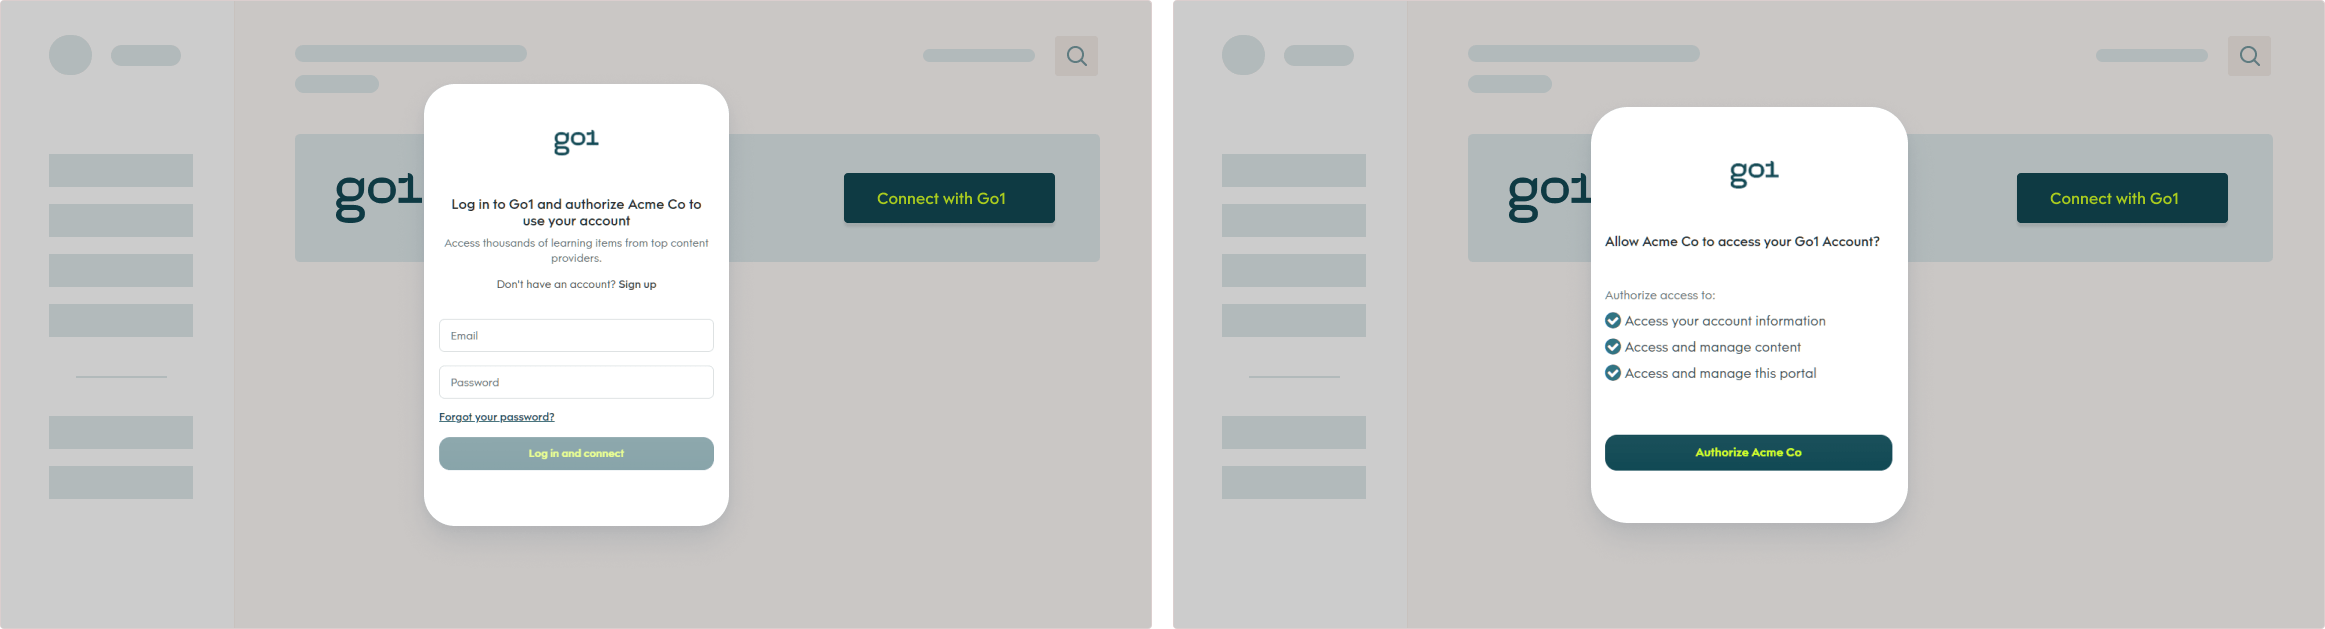
The user logs into Go1 via the login page using their existing Go1 login credentials (or can signup for a new account), then authorises your application to access their Go1 account resources.
4. Go1 returns the customers authorization code
After successful authorization, Go1 will return the connected customer's authorization code to your application. This code is returned along with your user to your OAuth clients redirect_url.
5. Your application completes the connection with Go1
To complete the connection, you will then make a request to Go1's OAuth 'token' endpoint, exchanging the authorization code for the connected users access_token and refresh_token.
The instructions below will walk through how to implement this flow into your application to allow your customers to connect with Go1.
Implementation steps
Step 1. Create the authorize link
In the example OAuth Connect flow, the connecting customer clicks the ‘Connect with Go1' button on your site, taking the user to the Go1 login and authorization page (see example screenshots below).
To create the link for the ‘Connect to Go1’ button, you’ll need to set up your OAuth Authorize link. Here is a template for creating the link:
https://auth.go1.com/oauth/authorize?client_id=<CLIENT_ID>&response_type=code&redirect_uri=<REDIRECT_URL>&scope=<SCOPES>&partner_portal_id=<PARTNER_PORTAL_ID>&state=<STATE_STRING>
To configure this link, add the below values to the template above:
- client_id, a unique identifier that is generated by Go1 when provisioning your Partner API Keys (see the Partner API Keys Setup Guide).
- redirect_url, a location in your application to which the authorization code will be returned after a successful connection is made by a user. You’ll set your redirect_url when you create your API keys (see the Partner API Keys Setup Guide).
- partner_portal_id, a unique identifier for Go1 Partners that will link all created customer portals to the partner for reporting and billing purposes. Our Implementations Team will provide you with your ID during onboarding (to learn more, contact us at integrations@go1.com).
- scopes, the list of permission scopes your app requires access to (see available scopes).
- response_type, with the value of code.
- state, this is an optional field that can contain a unique string that will be sent back to your redirect_url after a successful connection (this is often used as a security check to prevent CSRF attacks).
After creating the authorize link, you can test it by loading the URL directly in a browser. Once ready for use - the link can be presented to your users to begin the connection flow by adding it to a ‘connect with Go1’ button to your site.
Step 2: Customer authorizes access to their Go1 account
After the user clicks the connect button on your site, they’ll be taken to Go1’s Login and Authorization page. Here they will be prompted to log in with Go1 and authorize the connection to your app (see example screenshots below).
Note, if the connecting customer does not have a Go1 account they can use the sign-up option to create an account and authorize access to that new account directly within this flow.
Step 3: Authorization code is returned & user is redirected back to your site
After the customer connects their existing or newly created account via the Go1 Login and Authorization page, they are redirected back to your site to the redirect_url established when provisioning your API Keys.
In addition, after has successfully connected and authorized access, we will pass back an authorization_code, which you will find appended to the supplied redirect_url:
<REDIRECT_URL>/?code=<AUTHORIZATION_CODE>
The authorization code returned is short-lived, and can be used only once in the POST request described in the next step.
Step 4: Complete the connection & retrieve the customer's access_token
To complete the connection, your application will be required to make a POST request to our token endpoint, exchanging the authorization_code for an access_token and a refresh_token.
To build the POST request, you will need the following form-data details:
- your client_id
- your client_secret
- your redirect_url
- the authorization_code, retrieved in step 3
- grant_type, with the value of authorization_code
The POST request is made to https://auth.go1.com/oauth/token:
curl --location --request POST 'https://auth.go1.com/oauth/token' \
--form 'client_id=<CLIENT_ID>' \
--form 'client_secret=<CLIENT_SECRET>' \
--form 'code=<AUTHORIZATION_CODE>' \
--form 'grant_type=authorization_code' \
--form 'redirect_uri=<REDIRECT_URI>'
Go1 will return a response that includes an access_token and a refresh_token:
{
    "token_type": "Bearer",
    "expires_in": 43200,
    "access_token": "<CUSTOMERS_ACCESS_TOKEN>",
    "refresh_token": "<CUSTOMERS_REFRESH_TOKEN>"
}
The returned customers access_token can be used to authorize any subsequent API calls on behalf of the connected customer (eg. access the customer's content). This token is valid for up to 12 hours, at which point you will need to perform a request to refresh the token (see the refresh token instructions below).
The refresh token should be stored and used to fetch a new access token and refresh token when the current access token expires. Note - the refresh token is a single-use token, and has an expiration of 90 days. See the instructions below for how to refresh tokens.
Refreshing the connected customers access token
The access_token retrieved in the step above will expire after a 12 hour period. In order to retrieve a new access token, you are required to make a POST request to our token endpoint, where you will exchange the refresh_token (retrieved in step 4) for a new access_token and refresh_token.
To build the POST request, you will need the following form-data details:
- your client_id
- your client_secret
- grant_type, with the value of refresh_token
- a refresh_token, retrieved in step 4
The POST request is made to https://auth.go1.com/oauth/token:
curl --location --request POST 'https://auth.go1.com/oauth/token' \
--form 'client_id=<CLIENT_ID>' \
--form 'client_secret=<CLIENT_SECRET>' \
--form 'code=<AUTHORIZATION_CODE>' \
--form 'grant_type=authorization_code' \
--form 'redirect_uri=<REDIRECT_URI>'
Go1 returns a response that includes an access_token and a refresh_token:
{
    "token_type": "Bearer",
    "expires_in": 43200,
    "access_token": "<CUSTOMERS_ACCESS_TOKEN>",
    "refresh_token": "<CUSTOMERS_REFRESH_TOKEN>"
}
It is recommended that you perform the token refresh flow programmatically based on a check of the expires_in parameter.
You’re done! The customer portal is now connected to your platform. Remember to continue to store and refresh the supplied access_token and refresh_token in your database; these tokens must be kept up to date as they are used to perform all subsequent API calls on behalf of the customer.
In your application, you might want to consider using a dedicated OAuth client library to simplify these steps. To find an OAuth library for your language or framework, you can refer to the list of client libraries on the OAuth website.
Learn More
Now you can use the API on your customer's behalf to manage their portals, surface Go1 content in your platform, and more:
- Auth API Reference
- Full API Reference
- Go1 API Postman Collection (coming soon)
- Authentication
- Portal creation presets & settings (coming soon)
- Managing customer portals (coming soon)
undefined