Follow our quick-start guide to walk through an example of how to integrate a simple server-side application with the Go1 API.
Like many website applications, Go1 uses an API to send and retrieve Go1 data between applications. In order to access this API and to use this data for your application, you first must authorize users to access Go1 content.
This tutorial will walk you through how to build a server-side application that requests authorization and then sends a request to the Go1 API.
Learning Outcomes
- Create a portal and user account with Go1 and retrieve the necessary information to begin development
- Authenticate a user and retrieve authorization to access user data
- Request data from the Go1 API to view user data.
We will be using the following concepts and tools throughout this tutorial
- Node.js - Please ensure Node.js is running on your system. The Node.js tutorial will walk you through how to install and test if Node.js can run on your system
- A code editor such as Visual Studio Code or Atom
- We will also be accessing the example for the tutorial from Github
- Authentication and Authorization
- Go1 API
1. Set up your Go1 account to gain developer credentials
To begin an integration with Go1 you need an OAuth Client in the form of a client ID and client secret. These will be provided to you by Go1 when you get in touch.
The client secret must remain confidential and should not be pushed to public repositories or disclosed to users.
2. Create a new application project
Before proceeding please ensure that Node.js is installed and operating on your platform. Click here to check.
We can now begin building a server-side application that will authenticate and authorize users to make requests to the Go1 API.
2.1 Download or clone the Go1-quick-start-guide-tutorial project template from the Go1 GitHub and into your own project folder. (If you are unfamiliar with GitHub, click on the green ‘download or clone’ button and download it as a zip, ensuring that the folder is downloaded into the Go1_Tutorial folder).
2.2 Open the 'Go1-quick-start-guide' folder in your code editor. In this folder, you will see three separate folders titled, 'authorization_code', 'client_credentials' and 'implicit_grant'. Each of these folders contains code examples of different ways to request authorized access to the Go1 API. For more information on each of these methods and their use cases read the Authentication and Authorization Guide.
For this tutorial we will be running through the example 'authorization_code' so select that.
3. Set up application project with development details and requests
3.1 Install the necessary project files with the following command.
npm install
3.2 In the 'authorization_code' folder you will see a public folder that contains an 'index.html' and an 'app.js' file.
The 'index.html' contains the code for the user interface. This, of course, can instead be your own application.
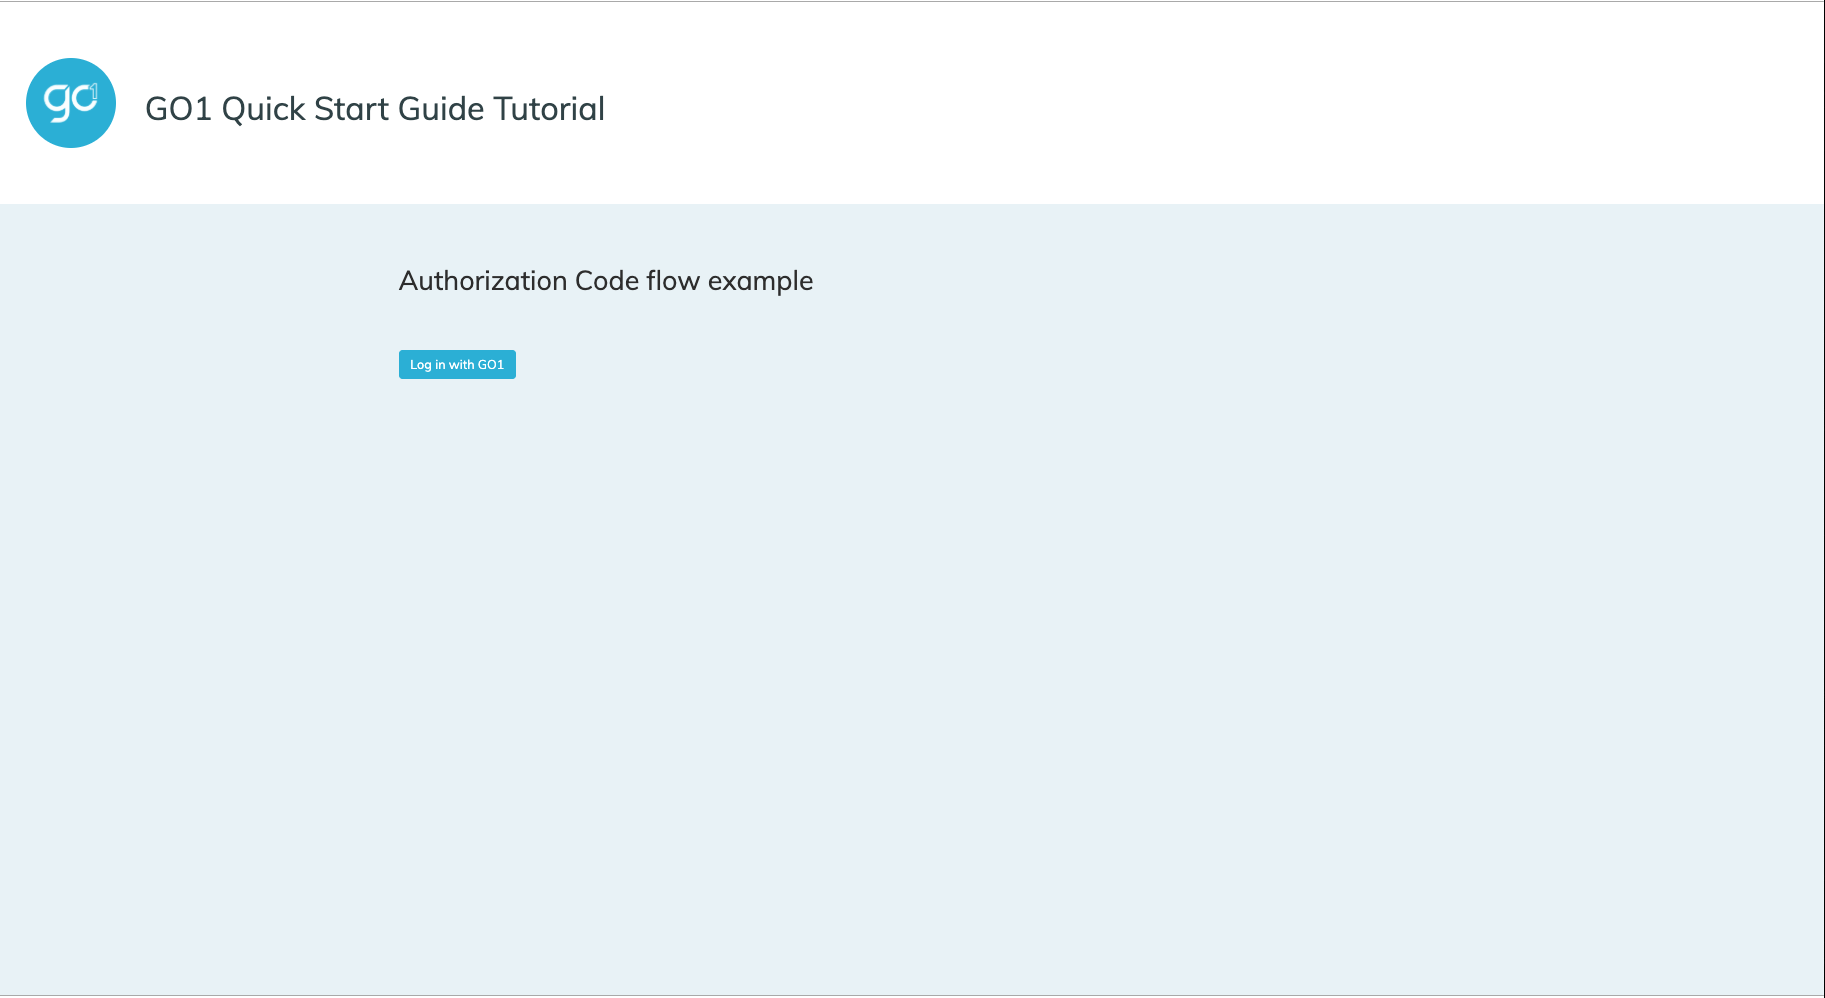
When we run the application this user interface will prompt the user to login and authorize their account with Go1.
<div id="login">
  <h2>Authorization Code flow example</h2>
  <a href="/login" class="btn btn-primary">Log in with GO1</a>
</div>
To begin the authorization process the user must be able to click a button that will redirect them to the Go1 Authorization flow, with the necessary details in the URL parameters. As seen here in our code example, we have a button that has an HREF redirect for login. We now want to specify what this URL is. To do so we navigate to the 'app.js' file that is outside of our public folder.
3.3 The 'app.js' is the file that will contain the code to set up our project and allow it to run on your system. It will also contain the code required to handle the login of the user, their specific scope, the request for an authorization code in exchange for an access token, as well as making a call to a Go1 API endpoint.
At the beginning of the file, update the variables, 'client_secret' and 'client_id' with the values that you were provided from Go1 in step 1. If you are working on your own application instead of following along with this tutorial, make sure to also update your 'redirect_uri'.
var client_id = 'client_id'; // Your client id provided by your GO1 portal
var client_secret = 'client_secret'; // Your secret provided by your GO1 portal
var redirect_uri = 'http://localhost:3006/callback'; // Your redirect uri,
3.4 Define the scope of the user that you wish to authenticate (see Scope permissions for more information). As you see in the example we have provided this user with a number of permissions.
 // your application requests authorization
var scope = 'user.read user.write account.read lo.read lo.write'; //to view more of what type of scopes there are click this url
res.redirect('https://auth.go1.com/oauth/authorize?' +
    querystring.stringify({
      response_type: 'code',
      client_id: client_id,
      scope: scope,
      redirect_uri: redirect_uri,
      state: state
    }));
});
3.5 The first call in the authorization process is a redirection to the Go1 authorize endpoint, '/oauth/authorize', where we ask the Go1 user to enter their credentials to authorize your application to act on their behalf. In this request, we will pass the client_id, scope and redirect URI. We will also pass the response_type and state which have already been predefined for you in this tutorial. In exchange, we will receive an authorization code, which will be used in the second call.
3.6 The second call will then be to the '/oauth/token' endpoint. In this call, the authorization code that was returned in the first call will be used to request an access token. An access token will allow the application to access the user's account according to their scoped permissions.
Access tokens are also valid for only 12 hours and must be ‘refreshed’ in order to maintain access to this data.
var authOptions = {
  url: 'https://auth.go1.com/oauth/token',
  form: {
    code: code,
    redirect_uri: redirect_uri,
    grant_type: 'authorization_code'
  },
  headers: {
   'Authorization': 'Basic ' + (new Buffer(client_id + ':' + client_secret).toString('base64'))
  },
    json: true
};
Don’t worry though, when we request an access token, we also request a refresh token. A refresh token is a one-time use token, that will be used to retrieve a new access token when the previous one has expired. A refresh token is requested again from the ’oauth/token’ endpoint with the grant type of ‘refresh_token”. If you would like further information on this flow then please see the Authentication and authorization guide.
// requesting access token from refresh token
var refresh_token = req.query.refresh_token;
var authOptions = {
  url: 'https://auth.go1.com/oauth/token',
  headers: { 'Authorization': 'Basic ' + (new Buffer(client_id + ':' + client_secret).toString('base64')) },
  form: {
    grant_type: 'refresh_token',
    refresh_token: refresh_token
  },
  json: true
};
3.7 Once these requests for authorization have been completed, we will then be redirected back to our previously specified redirect URI. In our tutorial, we have specified that we want to return to http://localhost:3006, the application that we will run on our local machine.
Now we can access other endpoints from the Go1 API in order to populate our application with data from Go1, such as user, enrollment or content data for example. Check out our Go1 API documentation to see what data you can request from certain endpoints.
For this tutorial, we will access the '/v2/me' endpoint, which will identify the current logged in user and provide their details in the response.
var options = {
  url: 'https://api.go1.com/v2/me',
  headers: { 'Authorization': 'Bearer ' + access_token },
  json: true
};
3.8 We can then use the data retrieved from the call to populate our front end in order to display the user details. In the 'index.html' we have listed the returned data in our code.
<script id="user-profile-template" type="text/x-handlebars-template">
  <h1>Logged in as {{first_name}} {{last_name}}</h1>
    <div class="media">
      <div class="media-body">
        <dl class="dl-horizontal">
          <dt>Display name</dt><dd class="clearfix">{{first_name}} {{last_name}}</dd>
          <dt>Id</dt><dd>{{id}}</dd>
          <dt>Email</dt><dd>{{email}}</dd>
          <dt>Created</dt><dd>{{created}}</dd>
          <dt>Last Login</dt><dd>{{last_login}}</dd>
          <dt>Roles</dt><dd>{{roles}}</dd>
       </dl>
     </div>
   </div>
</script>
4. Run the Application
4.1 Now that our application has been updated with our developer credentials and the requests for authorization, we can run the application on the node server. To do so, run it in your terminal.
node app.js
Then navigate to the http://localhost:3006 URL.
Your application should look like this now.
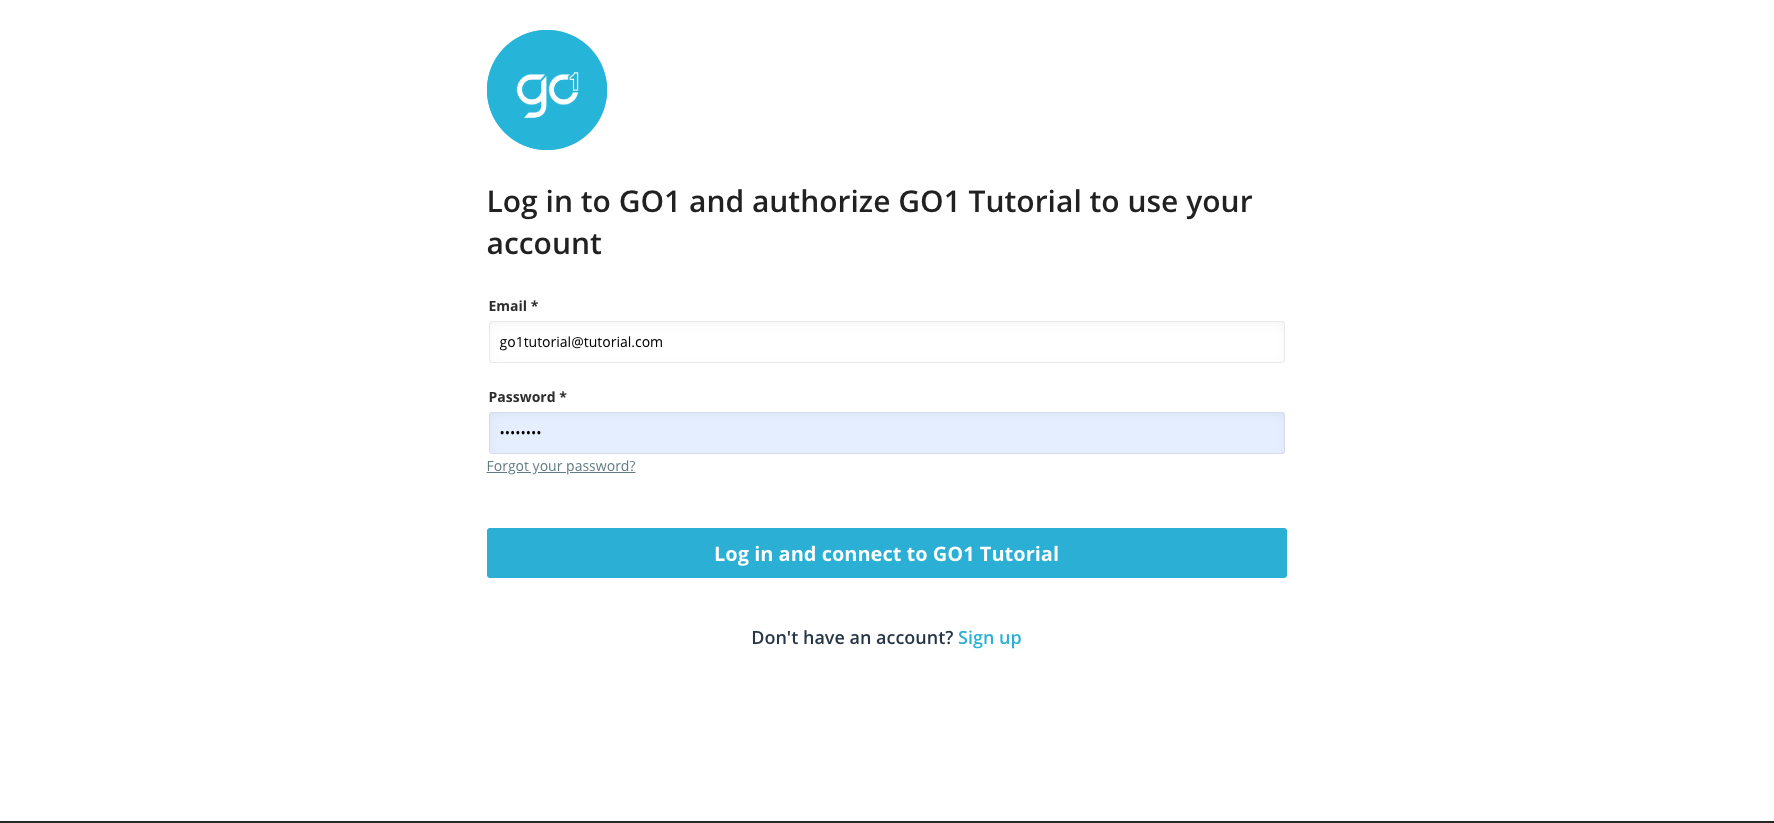
4.2 Once you click on the 'Log in with Go1' you should be redirected to the Go1 Authorization screen. Enter your credentials and click 'Log in'.
4.3 Go1 will now authenticate and authorize the user provided to access the application 'Go1_Tutorial'. It will then redirect back to the redirect URI we specified and show our screen now filled in with the details that we received from our call to Go1 API 'v2/me' endpoint.
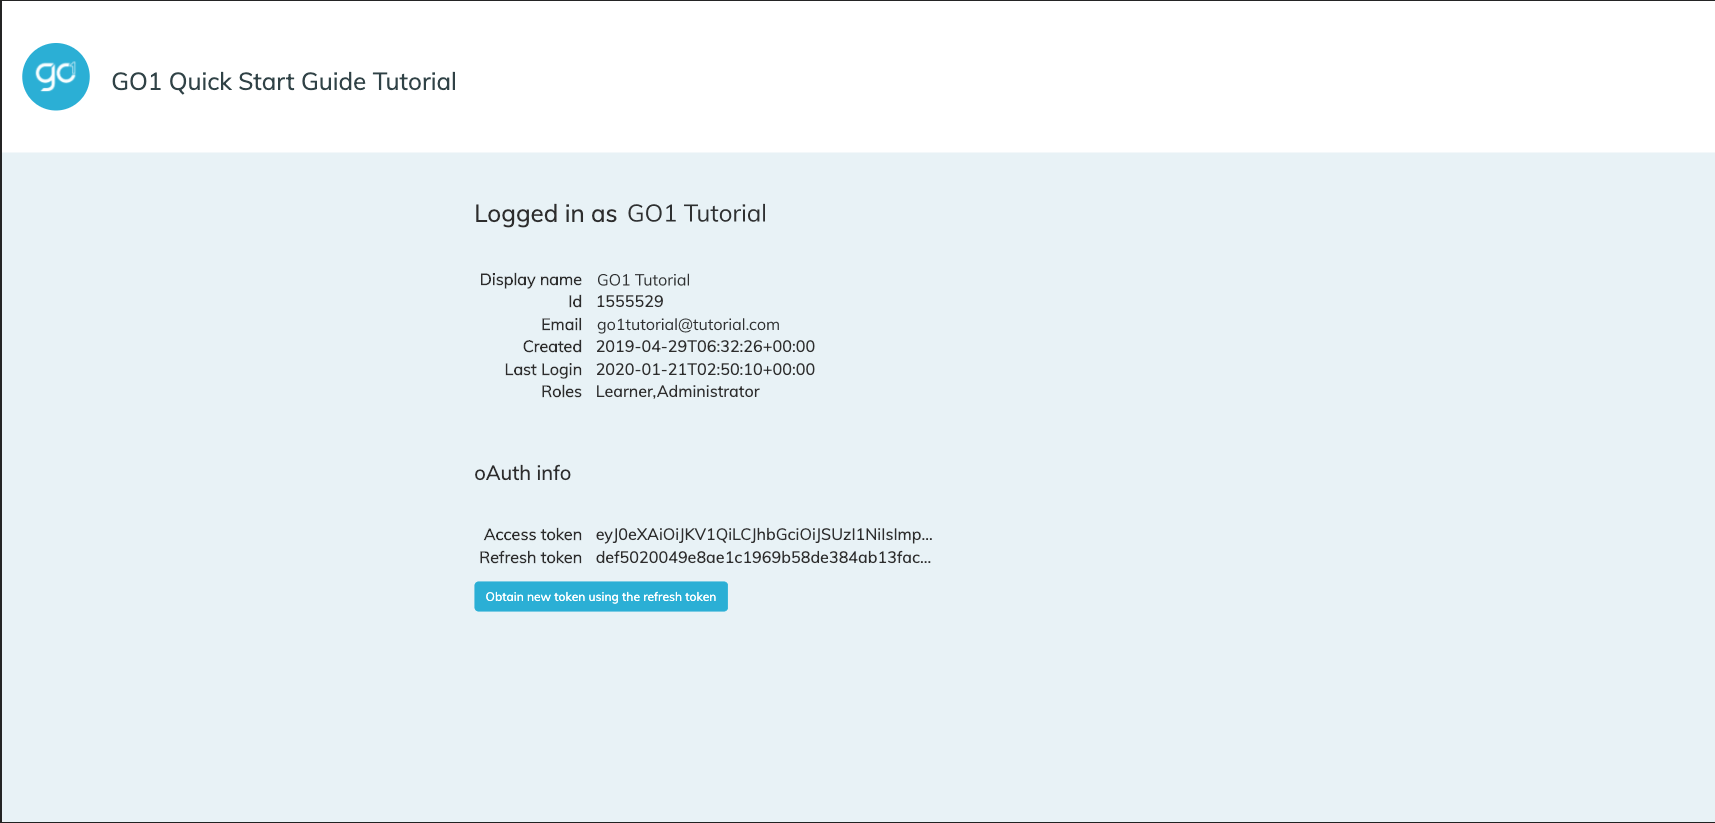
Congratulations! You have now completed the integration of a simple server-side application with Go1. Now you can expand this codebase to include other API calls to different endpoints, or you can begin the integration of your own application.